Showing posts with label upstairs bedroom. Show all posts

1.17.2012

Tutorial: Wood Wall

As promised, but a bit late, here's how we installed the wood wall in the bathroom.

First, we got a sick amount of neatly organized lath from Eva's gut job house in the country. Seriously, she handed over the neatest piles of wood organized by size.

The dude put up some luon on the wall and then we started the assembly-line process.The wood pieces were then installed with a finish nailer and some wood glue. We tried to vary the lengths and colors ... trying to be random we found to be hard at times.
We could only work on the bottom half of the wall since we had to wait to have the electrician come back to hook up the rest of the wiring.After the electrician came and did his magic, we added the top piece a luon. I was going to write a message on the wall before the luon went up, but I forgot. The message would be something like: What? You don't like this wood wall. You are a poopy head. I still have a chance to roll up a little note before the floor molding goes in.We mitered the end pieces and kept checking for square before we installed the side section of the wall. This part of the wall wasn't really square to begin with and adding the wood allowed us to fudge square.
After the wall was complete, the dude sanded the wall and added some of our hardwood floor poly on it. By sanding it, the white parts of the wood were removed to reveal a light color wood. Secretly, I like the wall better before the sanding but now I won't have a chance to get a major splinter if (when) I walk into the wall.

I have to give mega props of inspiration to the jersey ice cream co. Their wood wall is super awesome and inspired my project.


If you live in Philadelphia, they will even come to your place and install your very own lath wall.

1.12.2012

Zoom in - Zoom out


What's that you ask? Oh, it's our finished wood wall!


Also, we finally got around to picking a grout color, getting it up on the tub wall, and installing the fixtures.


We went with the color "Alabaster" to match the same color as the floor tile grout (and to hide any mortar mistakes). It really makes the white glass tiles look brighter.


Tomorrow I'll share how we installed the wall o'wood!

4.14.2011

Fabric brain explosion

Below are some fabric choices that are floating around in my head for the upstairs window seat...

420 Fabric Choices for upstairs


I would love to hear your thoughts and suggestions! It takes a village to make a decision around here.

Right now, everything is based off of the middle floral fabric...maybe it will end up being a bolster that would run the length of the window?? Who knows, really... do you know?

New to da blog or forget what the window seat project/shoe storage extravaganza is ... here's a link.

3.22.2011

Sneak peek

Build-ins 3.22.11

We are getting so close to finishing up this project. Catch up on the long process here.

3.09.2011

Things that keep me up at night

We are getting closer to finishing the upstairs shoe storage built-in things which means I gotta come up with window treatments (bleh, hate that word), pillows for the bench and sew up a bench cushion (or two).

So...I got fabric and pillows on my brain and I need some input. Below is what we have going on in the bedroom right now.

1. Wall Paint: Poetic Princess (very light icy lavender) from Ace Hardware 2. Bed: Upholstered bed from Ikea in a charcoal (similar to the Floro model, but not really!) 3. Bedding: duvet cover from Ikea in a very light gray 4. Trim work: basic white 5. Ceiling: soft white. Hardware is in stainless.

Any ideas for the question marks? I need some advice for fabric additions with print (maybe some ikat?) and should I stick with shades of gray or add an accent color.

I'm normally not afraid of using color, but in this space I'd like to have it a little more serene and spa like (another term I hate).

Here's an old post with a good idea of what the space is like (hello angled ceilings). You can also see another bench at the end of the bed that still needs to be covered too. I have some Amy Butler fabric for it, but am willing to change it.

Thanks guys! Hugs and Kisses.

1.18.2011

Now what? Sneaker drawers!

Finally, the shelves for the shoe storage towers are painted. I used Ace Hardware's Cabinet, Door and Trim paint (as recommended by non-paid-endorser Sara at Russet Street Reno - by the way check out her cabinets!).
In the end, the paint went on really nice even though it took 3-4 coats on each side of the shelf with a 6-8 hour drying time.

Photobucket

Photobucket


I'm still working on shelf placement and playing shoe tetris on which shoe goes on which shelf. Also some shoes are going to a nice farm in the country...shhh...don't tell them!

The shoe drawers are also a work in progress right now. With snow on the ground, we get a little stuck on the sanding and cutting wood process since that all gets done outside. And it is also ski season.

I wanted these drawers be pretty deep to have some flexibility in their use. Our plan is to use them as sneaker drawers, but the next person down the line might not have a large sneaker collection and want to use the storage for something normal like sweaters or linens.


So, I'm wondering how to divide the sneakers. They stand-up on their own, like how I currently have them, but need a divider for the next row of sneakers. Ideally, I would like something that could be moved and not so permanent. I did some research and most typical drawer dividers are too short for the width of these drawers.

Any ideas?

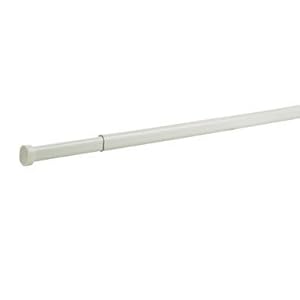
This tension rod is the only thing I could think of to divide and conquer the sneakers.

11.09.2010

Shoe Storage: Part Four


Will this project ever be done? I need to finish it up soon before it get's too cold to cut wood outside.

Over the weekend, some shelves got cut out of MDF (I wanted to go with wood as recommended by Kelly, but I lost) and the tracks got hung.

So now the important stuff ... deciding what shoes make the cut to be in the shoe towers, what shoes go to shoe heaven and which ones go next to each other. Sounds easy enough?


I still have to figure out a few things:
  • Paint or cover the shelves (wallpaper or contact paper)? What color?

  • What to do with my pretty shoe boxes (they might go into a plastic tub and find a home in the basement after the shoe bags are removed from the boxes)? Do you save shoe boxes too for your fancy shoes?

  • Is there something to put in the shoes rather than tissue paper to help them hold their shape?

Dokidoki Fries says, "please finish this project soon so I don't have to be next to the hiking boots!"

Check out our slow progress: Part One; Part Two; Part Three

10.25.2010

Shoe Storage: Part Three

Yep, we are still working on those shoe storage built-ins. They are now primed and have one coat of paint on them.

We decided to spruce up the inside of the cabinets with some old paint that I had from my last apartment. I'm surprised that the paint wasn't hard as a rock since it was from 2003. The grey is Flagstone by Olympic in a Semi-gloss.


We did have a little problem opening the can. The left-over paint had to be poured into some plastic chinese take-out containers since there was no way to put the top back on that bad boy.

Hopefully (fingers crossed) this week we will start getting some shelving in the two towers.

Any recommendations on the type of shelves that we should install? Right now, I'm thinking of white painted shelves in mdf or plywood with white contact paper on the tops. Remember, these shelves will be used for shoes. I'm up for some ideas!!


Check out our slow progress:
Shoe Storage: Part One
Shoe Storage: Part Two

9.27.2010

Shoe Storage: Part Two

Shoe built-in 9.27.10 from left

We are about the mid-point in this project. There is a date over our heads to finish it up...October 16th. The Dude's mother will be staying with us for a day or two and we'd like to have the master bedroom habitable so we can move out of the guest room. Nothing like a deadline to get this project moving!

So far, the shell of the shoe storage towers, most of the trim work, the floor molding and the center bench are complete. We still have shelves to cut, prime and paint the built-in, install the shelving supports, nail down quarter-round at the floor and build the drawers and doors.

I think we can rock this out in time.

By my guestimations, I'm thinking that each tower will hold 33 pairs of shoes and I have no clue how many shoes the drawers under the bench will hold (we actually haven't figured out how we are going to utilize the drawers...hopefully it will not be used to store the small shop-vac and compressor).

I can't wait to sit on the bench with a magazine and a cup of tea and stare out at my neighbor's mossy roof.

Shoe Built in 9.27.10

9.20.2010

Shoe Storage

We are making some progress!

After lots of measuring, building, carrying the towers up the steps, carrying the towers down the steps to trim - we have the shell of our shoe storage.

A bench seat will be between the towers for even more shoe storage - similar to this.

We have lots of shoes.


Click on the upstairs bedroom label to see our very slow progress over the past year-ish.

9.08.2010

The land of misfit projects

Over the long weekend we worked on the projects that we've been putting off. I'm sure you have those too...the projects that you just don't want to do.

First on the list- take out everything that is in the shed and make our yard look like an episode of Hoarders.

resize shed clean up 1

resize shed clean up 2

After getting organized and putting stuff back, the Dude touched up the shed porch paint. (one day I'll post about the story of building the shed)

Shed Sept 2010

Next up was relocating the air vent upstairs so we can start building the shoe storage unit.

Photobucket

Exciting, right?! The vent was originally located on the side of the dormer wall. Now the vent has been moved to the front of the wall, next to the built-in.

Photobucket

The third project on the crappy list: figure out what we want to do with the interior door hardware. You may remember that I used the crock-pot method to clean a bunch of old painted over door hinges and hardware.

The Dude decided that he doesn't "trust" the old hardware and wants the new stuff. We found a mortise set with glass knobs at Home Depot for $25 and gave it a try on a dutch door that goes to the upstairs. There is a brushed nickel back plate that still needs to be installed, but it is a start to the door hardware dilemma.


Photobucket

I also did a little touch up painting on the bathroom molding.

Photobucket

Well, that was our weekend! Hope you had a great long weekend.

Do you have easy projects that you've been putting off too?

(I promise I'll get a new camera soon. These crappy iPhone pics are not cutting it! Any camera suggestions?)

7.12.2010

Moving right along

We are back into "finishing the upstairs" mode and the Dude spent most of the weekend painting the molding and starting on the touch up painting. I spent that time trying to entertain the dog like some sort of clown entertainer, so he wouldn't whine when he knew he couldn't be with the Dude (they have some sort of special male bond that I will never have with Pilot) and to keep him from trying to get upstairs and ending up with a paint streak down his side.

Last night, I ordered a bicycle leash to wear this pup out and a dog bed for him to crash when not in the crate. These dogs and their accessories really add up!
Molly Mutt Mr. Roboto

Dog bed by Molly Mutt (Mr. Roboto)


Walky Dog Bicycle Leash (I hope this works!)

Finding things and toys to keep Pilot busy seems to be difficult since he's an "aggressive" chewer. The other day he "aggressively" chewed my door stop.
Pilot the chewer

I also need to start shopping for a stair runner and a larger rug for the family room since Pilot is a bit of a spazz on the hardwood floors.

He is starting to loose his new dog smell!

6.24.2010

Upstairs bedroom progress

Or should I say "not-so-much" progress...

So here's my list of excuses:
  1. We've been busy with other things.
  2. MDF is such a pain to pick up at the store since you need to find willing parent and time to borrow their truck.
  3. It's really really hot outside which makes the upstairs really hot.
  4. We need a couple hour block of day light to work on the molding.
  5. I need to pick more wall paint for touch-ups. I thought I would be good with left over paint, but I'm really bad a sealing cans. We do have a small sample in a semi-gloss but our walls are painted with a matte.
  6. We are also painting the basement floor.
  7. We like to watch tv.
Most of the molding is up (painted and caulked).


We got the bed upstairs and assembled without ending our 11 year relationship.


The solid wood dresser made it upstairs too.


Of course some of the shoes found a temporary home (more on this later).


Can't wait to wrap this project up and add 300+ square feet of living space to our home.

6.03.2010

Refinishing the floors: Part 3

Here's some fun (yeah, right) tips for refinishing hardwood floors that we learned along the way:

  • get a good mask: We wore crappy masks and interesting things were coming out of our nose (what, too much info?).
  • get ear plugs: Yeah, we didn't wear ear protection and our ears were ringing for quite some time. That edge sander is really loud when using in a room without furniture.
  • clean as you go: I'm a "clean as you go" person. Since our upstairs has a dutch door at the bottom of the stairs, we did not have any wood dust downstairs. I did keep a broom and bucket upstairs to sweep up as we were working. The only things I've had to clean up so far are the upstairs windows and moldings. Not too bad. We also emptied the drum sander bag frequently and used the shop vac to clean the sander about every hour.
  • tape up everything: We taped up the built-in cabinets but forgot to tape up our fake return duct. The upstairs return duct is actually our attic/bathroom fan. Last night, the Dude shop vac'd (is that a verb?) it out because we were afraid we would set the house on fire by a wood dust spark.
  • timing: You might consider sanding your floors before you move into your house with all of your junk things and not picking a weekend with the temperature in the 90s (which meant the upstairs was in the triple digits). We failed on both parts.
  • prep work: Prepping the room or for any project is the suckiest part of the job. You really need to take some time getting everything prepared for sanding and putting down poly. If you take a short cut, it will show or you have a chance to set your house on fire by not removing all of those stupid staples in the floor from the carpet. We also thought we could get away with not sanding between coats of poly. In between the first two coats we did not sand but then started after that since the floors did not feel that smooth.
  • low expectations: We had very low expectations going into the project. Originally we thought the boards would be in horrible condition and I was already mentally preparing to paint the floor. Also, it's an old house...we knew the floors would not look like the fancy new mcmansion.
  • vacation: Okay, this part is lame. But we treated this project like we were on some wacky three day vacation. We forgot to go food shopping prior to starting and was "forced" to eat out for most meals. We also treated our self to ice cream every night as a reward. Also, the Dude had to use my bathroom since his was the one upstairs housing a tv, a tv stand and shoe storage units. He mentioned that using my bathroom was like he was staying at a hotel. I know, what ever works...

Hope our mis-steps help you on your hardwood floor project.

Since this post is a bit long, I'll put something together with the budget and timeline a little later.

6.02.2010

Refinishing the floors: Part 2

After all of the prep and sanding, we were finally ready to poly the floors on Sunday night. We chose a water-based polyurethane in a semi-gloss from Behr. I wanted to use a water-based poly because it dried quickly and did not really have much of an odor.

Unfortunately....the tool rental guy that we purchased the poly from was not aware that 1. it was the last gallon at their Home Depot and 2. the reason it was their last gallon...because the product was being discontinued. We did not realize issue one or two until we needed another gallon the next day.

The poly was put down with a lambswool pad. We thought we could get away with not sanding and re-cleaning the floors between coats, but after the second coat we realized we really should sand. While the Dude was out looking for more poly, I went to our local Ace Hardware to get the sand paper, sandpaper pad attachment, a scraper for the corners (the edge sander could not get in the corners) and a microfiber cloth.

The Dude secured two more gallons (one extra for "just in case") and we put down two more coats with sanding in between.

Now we have to wait 72 hours after the last coat for the floors to cure. Ugh, I can't wait to get the room and house back in order!!

Sorry for the crappy iPhone pictures...

Photobucket

Photobucket

Photobucket

Photobucket

Photobucket

Photobucket

The next post will be lessons learned and other fun tips! Wheee!